Most photographers spend their lives hunting for “the perfect subject.” They wait for the perfect sunset or the perfect street character. But a professional, an Architect of the Frame, knows that a great subject in a poorly constructed frame is a wasted shot.
Today, we stop being hunters and start being builders. We are going to use Compositional Geometry to turn the mundane into the monumental.
1. The Landscape: Beyond the “Rule of Thirds”
The Rule of Thirds is a kindergarten tool. To move toward professional landscape work, you must master The Leading Line vs. The Path of Entry.
The Concept: A “Leading Line” is a line that points to something. A “Path of Entry” is a visual invitation that pulls the viewer’s feet into the photo.
The Execution: In the open fields of Transylvania or the marshes near Venice, don’t just look for a line. Look for a “S-Curve” or a “Z-Path.” These shapes create a slower, more immersive visual journey than a straight diagonal.
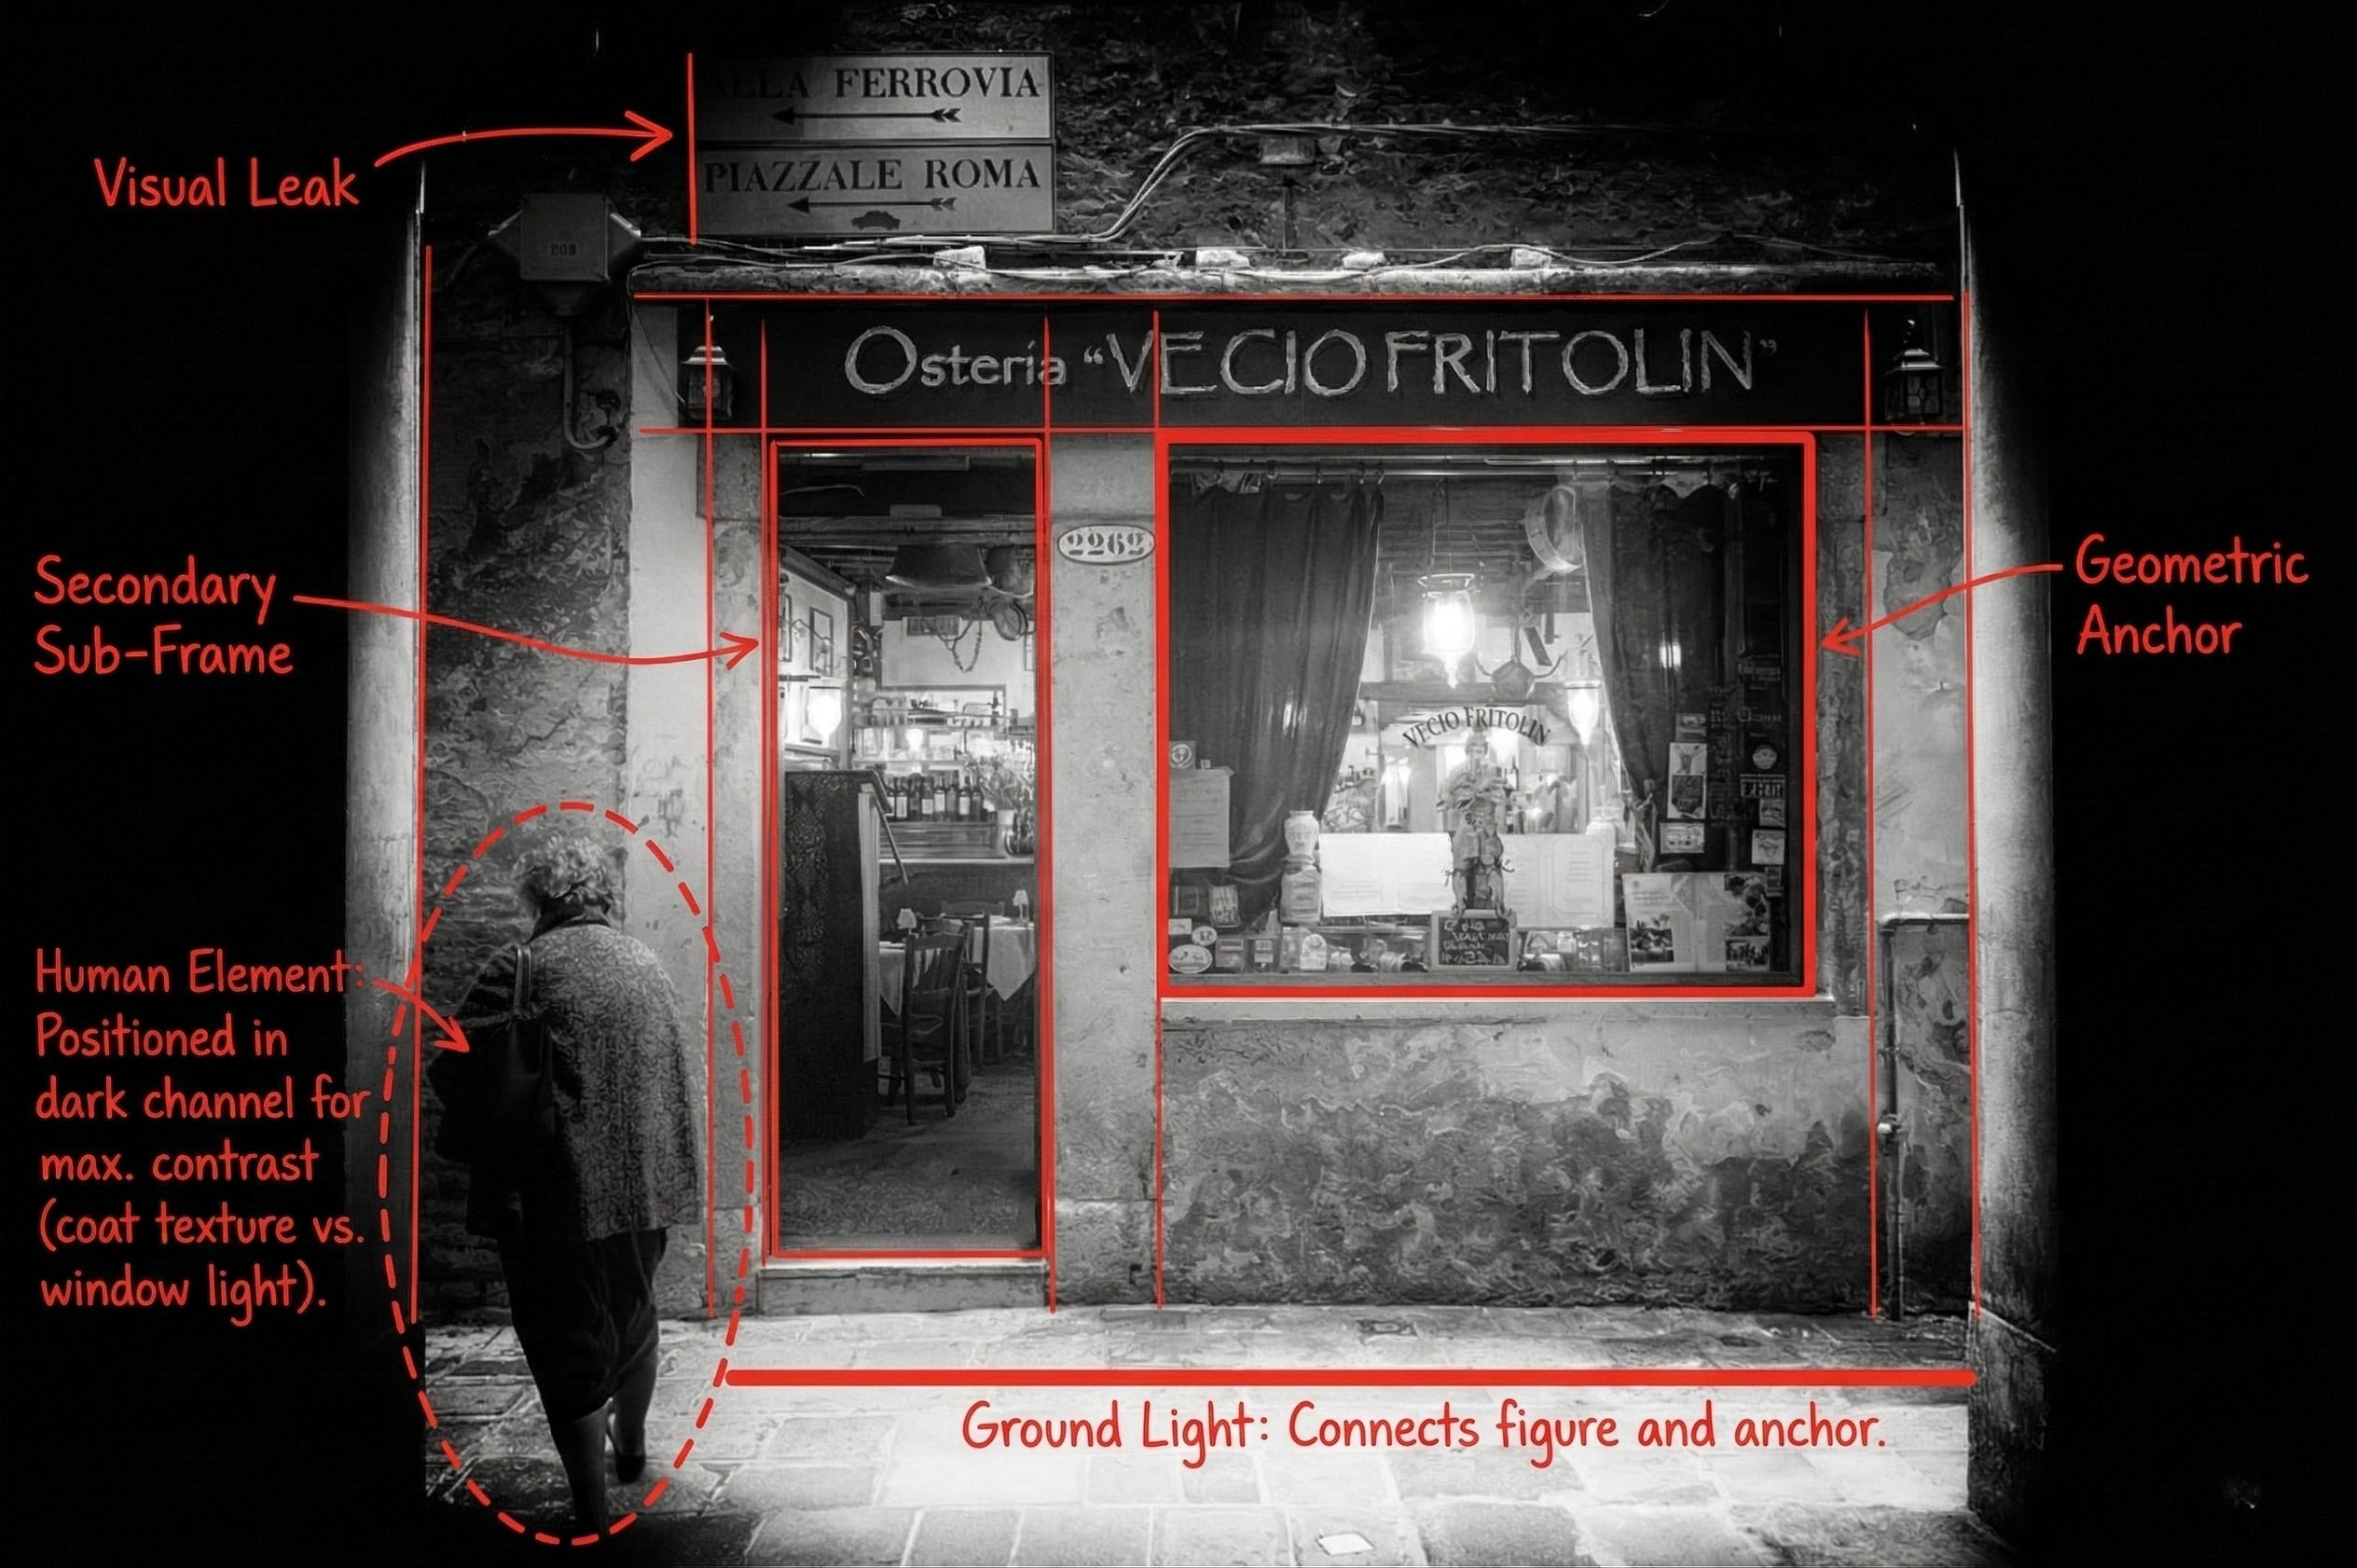
Pro Secret: If your leading line hits the edge of the frame before reaching the subject, you’ve created a “Visual Leak.” You’re literally leading your viewer out of the photo.
2. The Portrait: The “Sub-Frame” Technique
Beginners often focus so hard on the eyes that they forget the edges. A professional portrait uses the environment to create a “Gallery Effect.”
The Concept: Use architecture (doorways, windows) or nature (branches, rock faces) to create a secondary frame inside your camera frame.
The Execution: Don’t just place your subject in front of a wall. Move them into the “negative space” of a doorway. This creates depth and immediately elevates a simple headshot into an editorial portrait.
3. The Street: The “Wait for the Anchor” Method
Street photography isn’t “spray and pray.” It’s about Geometric Patience.
The Concept: Identify a strong geometric shape in the city first—a triangle of light on a wall, a circular manhole, or the hard rectangle of a shopfront.
The Execution: This is the “Stage Setting.” Once you have your “Anchor” (the shape), you wait. You don’t move. You wait for the human element to walk into the geometry.
The Result: Your photo will look like you spent hours posing the world, when in reality, you just understood the geometry of the street.
🧱 The Professional Foundation: Visual Weight & Balance
Before you press the shutter, ask yourself: “Is this frame heavy or balanced?”
A dark object in a bright corner has more “weight.”
A person looking toward the edge of the frame creates “directional tension.”
Mastering these is the difference between a snapshot and a masterpiece.
🔓 THE MASTERCLASS: The Pro-Level Blueprint
To truly bridge the gap from “doing photography” to “being a photographer,” you need to see the mechanics of the edit and the specific drills that professional agencies look for.
PAYWALL: Join the Inner Circle to Unlock
Inside the Paid Masterclass for Lesson 8:
The “Three-Shape” Field Drill: My 10-minute daily exercise that forced me to see geometry in the chaos of London and Edinburgh.
The Layering Masterclass: Exactly how to stack Foreground, Midground, and Background without making the photo look “busy.”
Unlock Lesson 8’s Practical Phase:
The Monday Blitz: Only subscribers can submit their frames for the “Architectural Check.”
The Tuesday Master Gallery: Access the full breakdown where I apply the Digital Red Pen to the group’s work, showing you exactly where the visual leaks are and how to fix them.
This is how I will critique your photo
Direct Mentorship: This isn’t just a newsletter; it’s a weekly audit of your progress by a Getty-represented photographer.